Skip to content
Are your RV cabinets looking tired or outdated? You can give your camper a fresh, clean look without spending a fortune by painting your RV cabinets yourself.
It’s a smart way to brighten your space and add a personal touch that feels like home on wheels. But before you grab a brush, you’ll want to know the best techniques, the right kind of paint, and how to prepare your cabinets so the finish lasts through all your adventures.
Keep reading, and you’ll discover simple steps that make painting your RV cabinets easier than you think—helping you transform your space quickly and with professional-looking results. Ready to get started? Let’s dive in!
You May Like

- ▶ Quality is very good: the surface of the wooden wall board uses…
- ▶ Ample storage space: The bathroom wall cabinet is 19.7 inches high and…
- ▶ Cabinet design: frame door design, simple and beautiful, cross…
- ▶ Hinge damper: Using hardware material, with the buffer force of the…

- 【Perfect for Tight Spaces】It is 67″ tall so is a great vertical storage…
- 【Scenario Multipurpose】Use it as a pantry cabinet in the kitchen to…
- 【Adjustable Shelves】With adjustable shelves featured inside, this…
- 【Safety for Your Home】Built with high-quality particleboard, which is…

- Vintage Design, Clever Decoration: This wall mounted bathroom cabinet is a…
- Multifunctional Bathroom Medicine Cabinet: This bathroom wall cabinet is…
- Reliable Parts, Really Sturdy: This over the toilet storage cabinet is made…
- Wall-Mounted for Optimized Space: Measuring 15.7 x 6.9 x 24 inches, this…

- [Durable and easy to clean] The metal wall cabinet is made of sturdy…
- [Simply press to open]Up-Flip door Design make the wall mounted storage…
- [Safe and convenient storage] 31.5″W*12.6″D*13.8″H. Metal wall cabinets can…
- [Easy to assemble] The tool cabinet that requires assembly. We provide…

- Heavy-duty Material : Made of polyethylene with 3 layers( a layer of…
- Great Adhesion: Permanent adhesive patch to cover up or protect the…
- Easy to Use: Cut a strip of tape slightly longer than the opening, then…
- Universal Use: This tenacious tape can repair damages underneath RV caused…
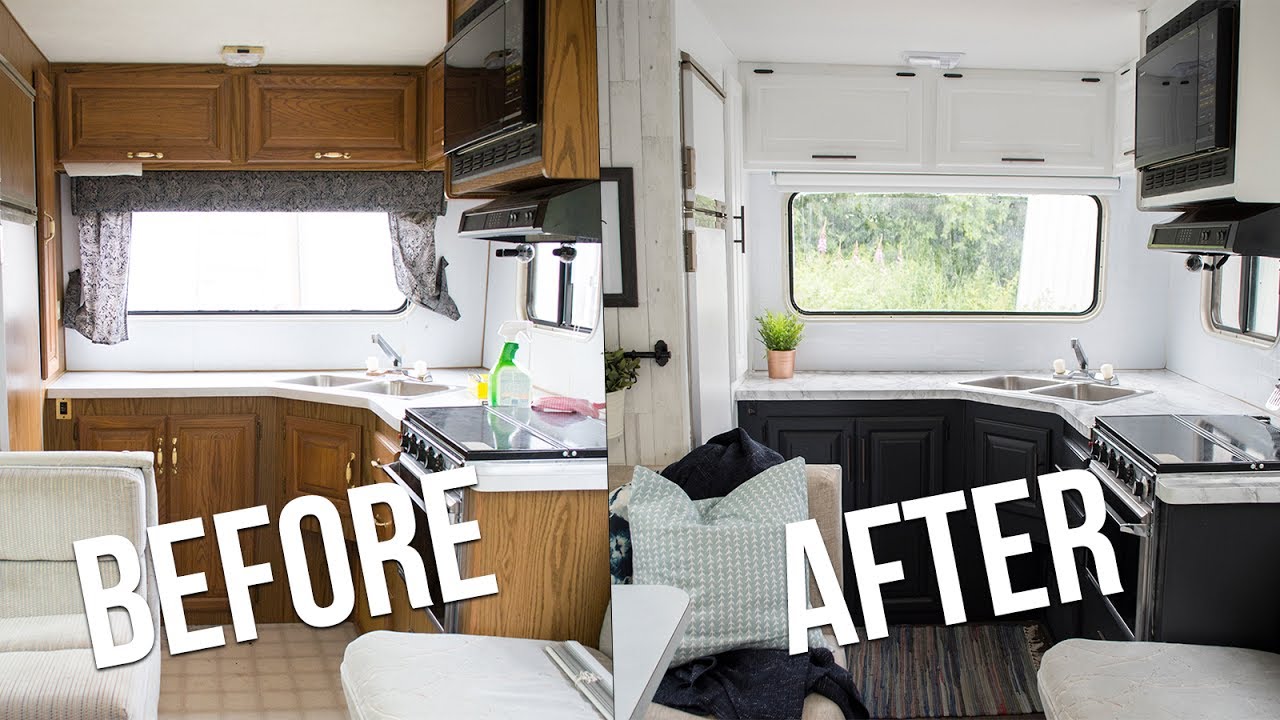
Credit: www.youtube.com
Choosing The Right Paint
Picking the right paint is key for painting RV cabinets. Cabinets need paint that lasts through heat, moisture, and frequent use. The paint must resist chipping and be easy to clean. Choosing the correct type ensures a smooth, lasting finish.
Not all paints work well on RV cabinets. Some paints peel or fade quickly. The right paint type and brand protect your cabinets and keep them looking fresh.
Top Paint Brands
Sherwin-Williams Emerald Urethane Enamel is a favorite among RV owners. It gives a smooth finish like oil paint but cleans with soap and water. This paint levels itself and resists wear.
Benjamin Moore Advance offers a factory-smooth finish. It is a bit pricier but gives a professional look. Its durability makes it ideal for frequent use.
Behr Urethane Alkyd is another strong choice. It combines the hardness of oil paint with easy water cleanup. It holds up well in hot and humid conditions.
Best Paint Types For Durability
Urethane alkyd paints are top for RV cabinets. They dry hard and resist scratches. Acrylic enamel paints are also good. They offer strong adhesion and a smooth surface.
Satin or semi-gloss finishes work best. They are easy to wipe clean and hide fingerprints. Avoid flat or matte paints as they stain and wear fast.
Always use a quality primer before painting. Primers help paint stick better and last longer. Sanding the surface before priming improves grip.
Paints To Use With Caution
Latex house paint is not ideal. It can peel quickly on cabinets that flex during travel. Cheap spray paints often lack durability and chip easily.
Oil-based paints can yellow over time and take long to dry. They also need harsh solvents for cleanup. Avoid paints that do not say “for cabinets” or “for trim.”
Always test paint on a small cabinet area first. This step shows how well it sticks and how it looks after drying.
Preparing Rv Cabinets
Proper preparation is key to a smooth and lasting paint job on your RV cabinets. It ensures the paint sticks well and looks even. Skipping steps can lead to peeling or uneven surfaces.
Take your time cleaning, sanding, and priming. These steps build a strong base for painting. Clean surfaces help remove dirt and oils that block paint adhesion. Sanding creates texture for the primer to grip. Priming seals the wood and prevents stains from bleeding through.
Cleaning And Deglossing
Start by wiping the cabinets with a gentle cleaner. Use a degreaser to remove built-up grime and grease. This step is important for RV kitchens where cooking oils can linger.
Next, apply a deglosser or liquid sandpaper. It dulls shiny surfaces and improves paint adhesion. Use a clean cloth to rub it on evenly. Let it dry fully before moving on.
Sanding Techniques
Sand the cabinets with fine-grit sandpaper, around 220 grit works well. Sanding removes old finish and smooths rough areas. Always sand in the direction of the wood grain.
For hard-to-reach spots, use a sanding sponge or folded sandpaper. Wipe away dust with a tack cloth after sanding. A clean surface is vital before priming.
Priming Tips
Choose a high-quality bonding primer for RV cabinets. It helps paint stick to slick surfaces like laminate or veneer. Use a brush for corners and a foam roller for flat areas.
Apply the primer in thin, even coats. Allow each coat to dry completely before adding another. Priming prevents stains and ensures paint lasts longer.
Painting Process
The painting process transforms your RV cabinets with a fresh, clean look. It requires careful steps to ensure the paint adheres well and lasts long. Preparing properly and using the right techniques makes a big difference. Follow this guide to paint your RV cabinets smoothly and evenly.
Start with gathering all tools and materials. Then, apply a good primer for better paint adhesion. Use proper painting techniques to avoid brush marks. Allow enough drying and curing time for a durable finish.
Tools And Materials Needed
Use a high-quality bonding primer designed for RV surfaces. Choose urethane alkyd or acrylic enamel paint for durability. Have fine-grit sandpaper to smooth the cabinets. Use foam rollers and angled brushes for even application. Keep painter’s tape and drop cloths handy to protect areas. Wear gloves and a mask for safety.
Applying Primer
Clean the cabinet surfaces thoroughly before priming. Sand lightly to remove old finish and create a rough surface. Apply a thin, even coat of bonding primer. Let the primer dry completely as per instructions. This step improves paint adhesion and prevents peeling.
Painting Techniques For Smooth Finish
Use a foam roller to apply paint in thin layers. Start with long, even strokes following the wood grain. Use an angled brush to reach corners and edges. Avoid overloading the brush or roller with paint. Apply two or three thin coats instead of one thick coat for better results.
Drying And Curing Times
Allow each paint coat to dry fully before adding the next. Drying times vary by paint brand and weather conditions. After the final coat, let cabinets cure for several days for maximum hardness. Avoid heavy use or cleaning during the curing period. Patience ensures a durable, long-lasting finish.
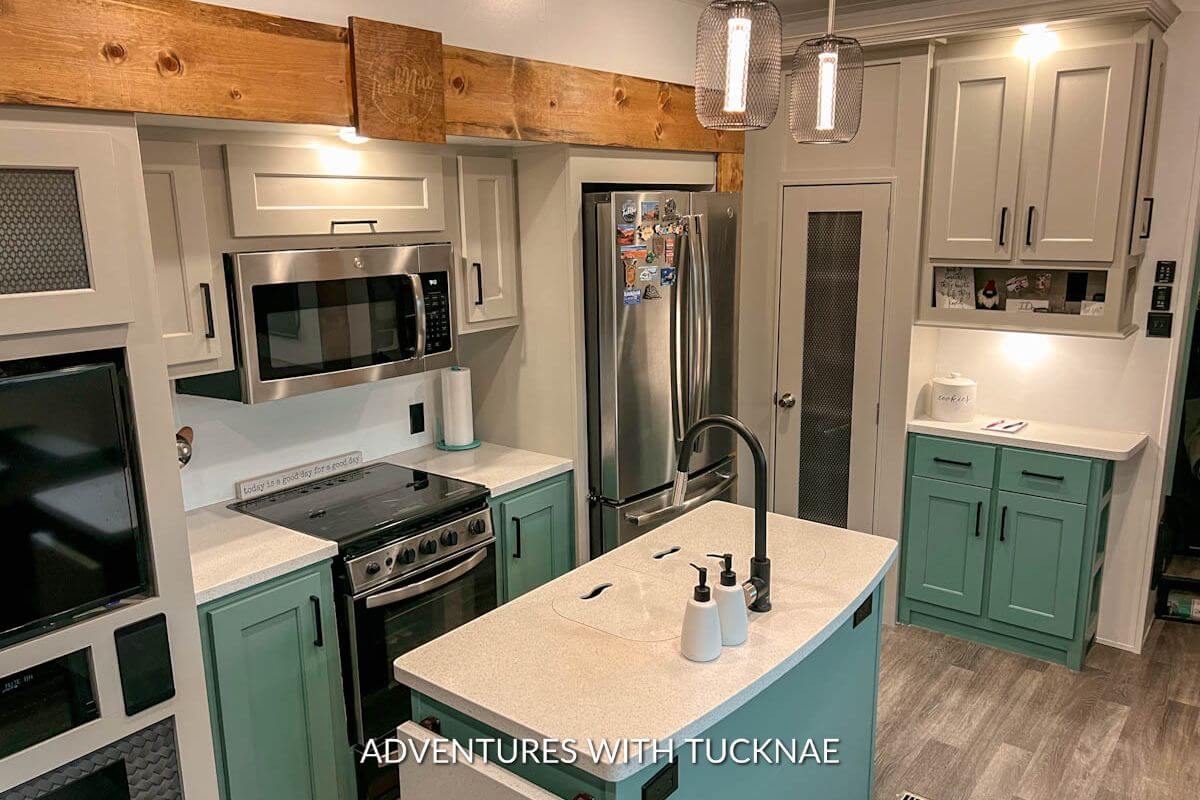
Credit: adventureswithtucknae.com
Finishing Touches
Finishing touches bring your RV cabinets to life after painting. They protect the paint and boost the look. Proper final steps ensure your cabinets stay fresh and last longer. Focus on the right finish, sealing, and hardware for the best results.
Choosing The Right Finish
Select a finish that fits your RV lifestyle. Satin and semi-gloss finishes work well. They offer a slight shine and resist dirt. Glossy finishes look bright but may show scratches easily. Matte finishes hide flaws but can be harder to clean. Always pick a finish that balances beauty and durability.
Sealing And Protecting Cabinets
Seal the paint to protect cabinets from moisture and wear. Use a clear polyurethane or a water-based sealer. These products add a strong, clear layer over the paint. Apply thin, even coats and let each dry fully. Proper sealing prevents peeling and keeps colors vibrant longer.
Handling Hardware And Details
Remove cabinet hardware before painting for smooth coverage. Clean or replace old knobs and handles for a fresh look. Reattach hardware carefully to avoid scratches. Consider upgrading to new styles to enhance your RV’s interior. Small details make a big difference in the final appearance.
Common Mistakes To Avoid
Painting RV cabinets can transform your space beautifully. Avoiding common mistakes ensures a smooth, lasting finish. Many DIYers rush or skip steps, leading to peeling or uneven paint. Careful attention helps you save time and money. Here are key mistakes to avoid for the best results.
Skipping Prep Work
Preparation is the foundation of a good paint job. Do not skip cleaning or sanding your cabinets. Dirt, grease, and old finishes stop paint from sticking well. Sanding creates a rough surface for paint to grip. Use a good primer to seal and protect the wood. Skipping these steps causes peeling and chipping later.
Using Wrong Paint Types
Choose paint made for cabinets or RV use. Avoid regular wall paint or cheap options. Urethane alkyds and acrylic enamels offer durability and smooth finishes. They resist scratches and clean easily. The right paint lasts longer in the RV’s moving and humid environment. Pair paint with a quality bonding primer for best adhesion.
Ignoring Drying Times
Patience is key between coats. Rushing to add another layer traps moisture and causes bubbles. Follow the paint manufacturer’s recommended drying times. Allow full curing before using cabinet doors or drawers. Proper drying prevents smudges, uneven texture, and peeling. Your hard work deserves time to set perfectly.
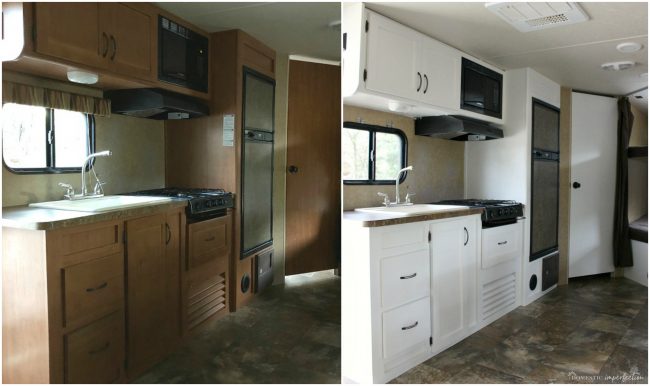
Credit: wildfireinteriors.com
Maintenance Tips
Maintaining your freshly painted RV cabinets keeps them looking new longer. Proper care prevents damage and wear from daily use. Simple steps help preserve the paint finish and protect your investment.
Cleaning Painted Cabinets
Use a soft cloth or sponge with mild soap and water. Avoid harsh chemicals or abrasive scrubbers that can scratch paint. Wipe spills quickly to stop stains from setting. Dry cabinets with a clean towel to prevent moisture damage.
Touch-up Techniques
Keep leftover paint for quick repairs. Lightly sand any chipped or scratched areas before applying touch-up paint. Use a small brush to blend new paint into existing surfaces. Let each layer dry fully for a smooth finish.
Extending Paint Life
Limit direct sunlight exposure to avoid fading. Open cabinets gently to reduce stress on painted edges. Use cabinet liners to protect surfaces from spills and scratches. Regular cleaning and timely touch-ups extend the paint’s durability.
Frequently Asked Questions
What Kind Of Paint Do You Use To Paint Camper Cabinets?
Use durable urethane alkyd or acrylic enamel paints like Sherwin-Williams Emerald Urethane, Benjamin Moore Advance, or Behr Urethane Alkyd. Apply a quality bonding primer and choose satin or semi-gloss finish for easy cleaning and a smooth, long-lasting surface on camper cabinets.
Can You Paint Rv Cabinets Without Sanding?
Yes, you can paint RV cabinets without sanding by using a high-quality bonding primer and cleaning surfaces well. This ensures good paint adhesion and a smooth finish.
Is It Better To Brush Or Roll Paint On Cabinets?
Rolling paint on cabinets provides smooth, even coverage and speeds up the job. Brushing helps reach corners and detailed areas. Combining both methods often yields the best finish on cabinets.
Can I Just Paint Over Old Paint On Cabinets?
You can paint over old cabinet paint only after thorough cleaning, sanding, and priming. This ensures proper adhesion and a smooth finish. Skipping prep may cause peeling or uneven results. Use a quality bonding primer and durable paint for the best outcome.
Conclusion
Painting RV cabinets can refresh your camper’s look quickly. Use proper prep steps like cleaning and sanding for best results. Choose durable paints made for cabinets to ensure long-lasting finish. Apply primer to help paint stick and avoid peeling. Take your time with each coat for a smooth, even surface.
Let paint dry fully between layers to prevent smudges. With patience and care, you can create a fresh, clean space inside your RV. Enjoy your updated cabinets that look great and resist wear on the road.